


 61 / 68

Submission
61
Creating a PDF File Using PDFCreator (Windows)
PFDCreator is a cost-free PDF creator. It can be downloaded from our
website at ‘Customer Service’.
1. Start the installation of PDFCreator and follow the steps.
Select
”Compact Installation”
when asked to install components. After
installation, PDFCreator can be used as a virtual printer.
2. Go to
File > Print
. Select PDFCreator from your list of printers and go to
“Settings”
.
Verify that the correct format has been selected, which you
used in the Word Page Setup. Then select
“Print”
.
3. You will now see a window of PDFCreator.
IMPORTANT:
At
“Profile”
, select the option
“High Quality”
.
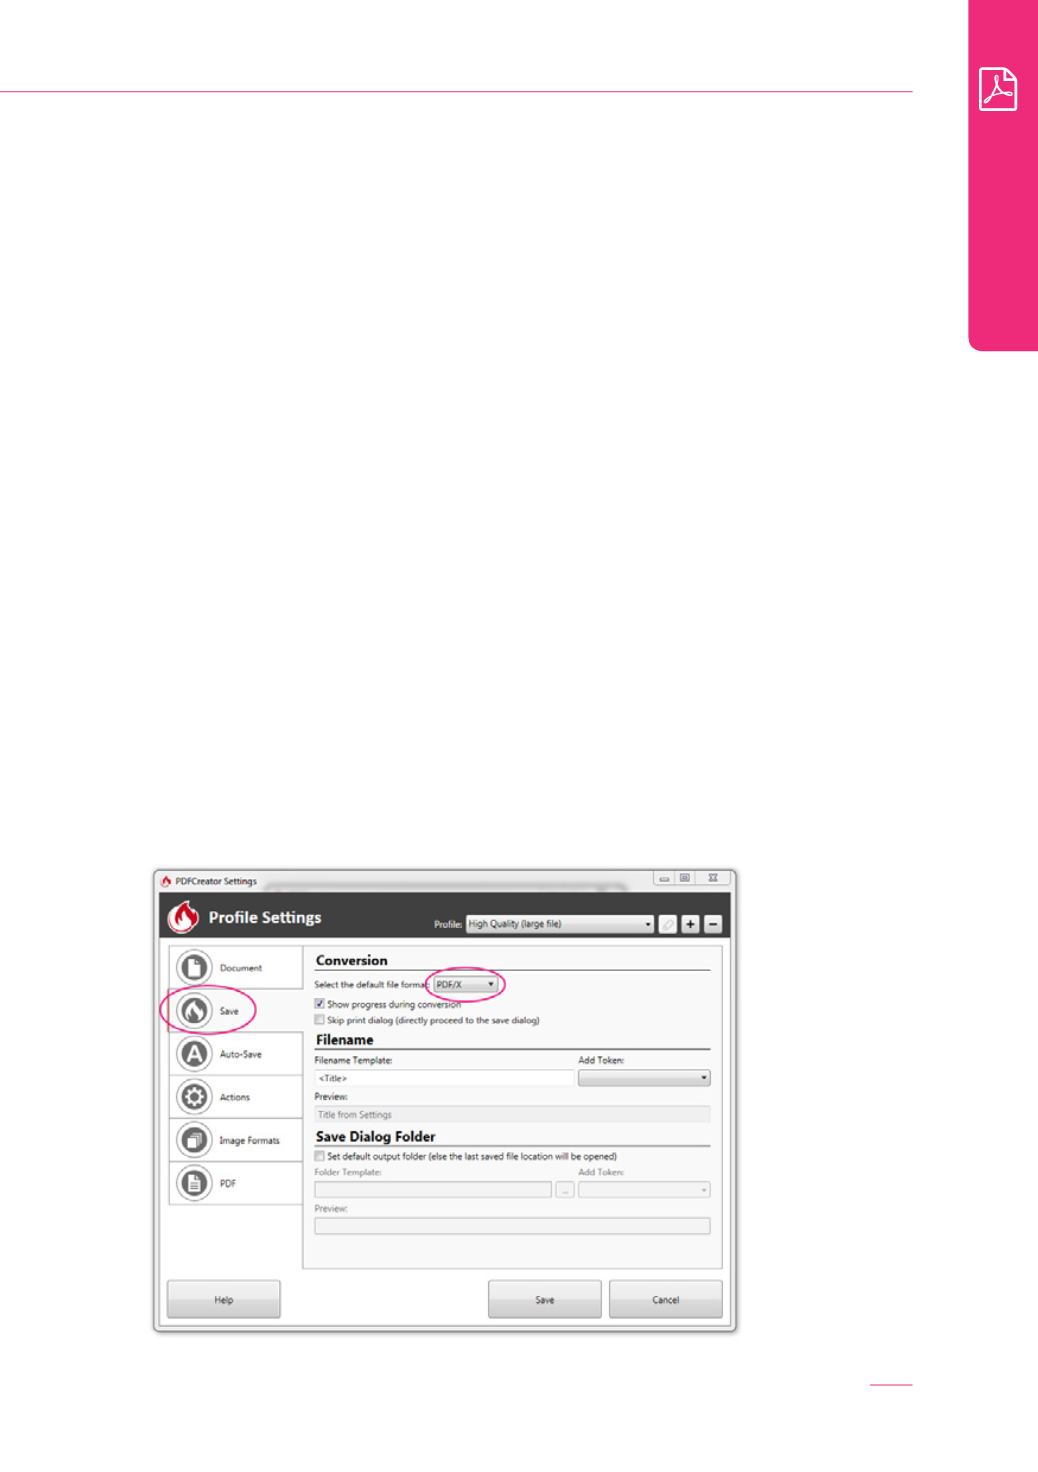
Go to
“Settings”
and then the tab “Save”.
Make sure at
“Select default file format”
the option
“PDF/X”
is selected.
After this, select
“Save”
on the bottom of the window. The settings are
now saved.
4. Back in the PDFCreator window, again select
‘Save’
. You can now name
the PDF and save it to directory of your choice.
Select the option
‘PDF/X’ in the settings